How to - Setup a Resource Calendar
Once have permission to a resource calendar, you can start using it right away.
When you need to schedule an appointment using a resource, you can CC the resource calendar (logmein@vos365.com, example); which will automatically book your appointment if that spot is available, or if not it will deny the appointment with a reason why.
To view this calendar, you will want to open your Outlook to the Calendar section.
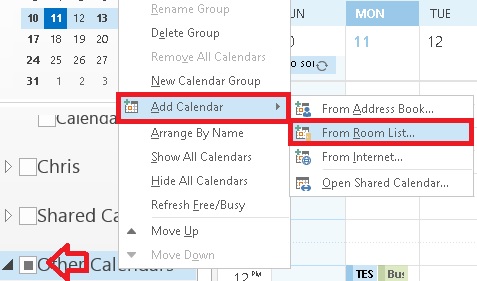
Then Right click on the calendar section “Shard Calendars” or “Other Calendars”, then select “Add Calendar à From Room List…” (See below).
This will open your Address Book, and you will want to look in the Global Address book for the resource calendar you’re looking for (Logmein@vos365.com, example).
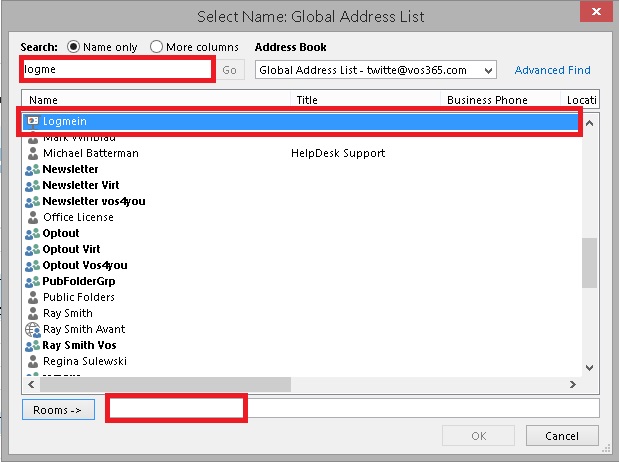
The resource calendars have a different logo from a normal contact or distribution list.
Select the Resource Calendar by double clicking it, until it shows up in the section below.
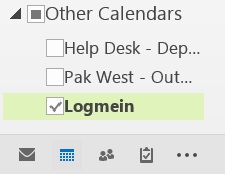
After you have added the Resource Calendar, you will see it listed in your calendar section.
Make sure it’s selected from the left Navigation panel, and also you can over lay the calendar as needed.
Once the Resource Calendar has been added, you can check the Calendar before scheduling.
Please send an email to helpdesk@vos365.com if you have further questions or comments.

Leave a comment!
You must be logged in to post a comment.